
Crafted In Florida

The Design
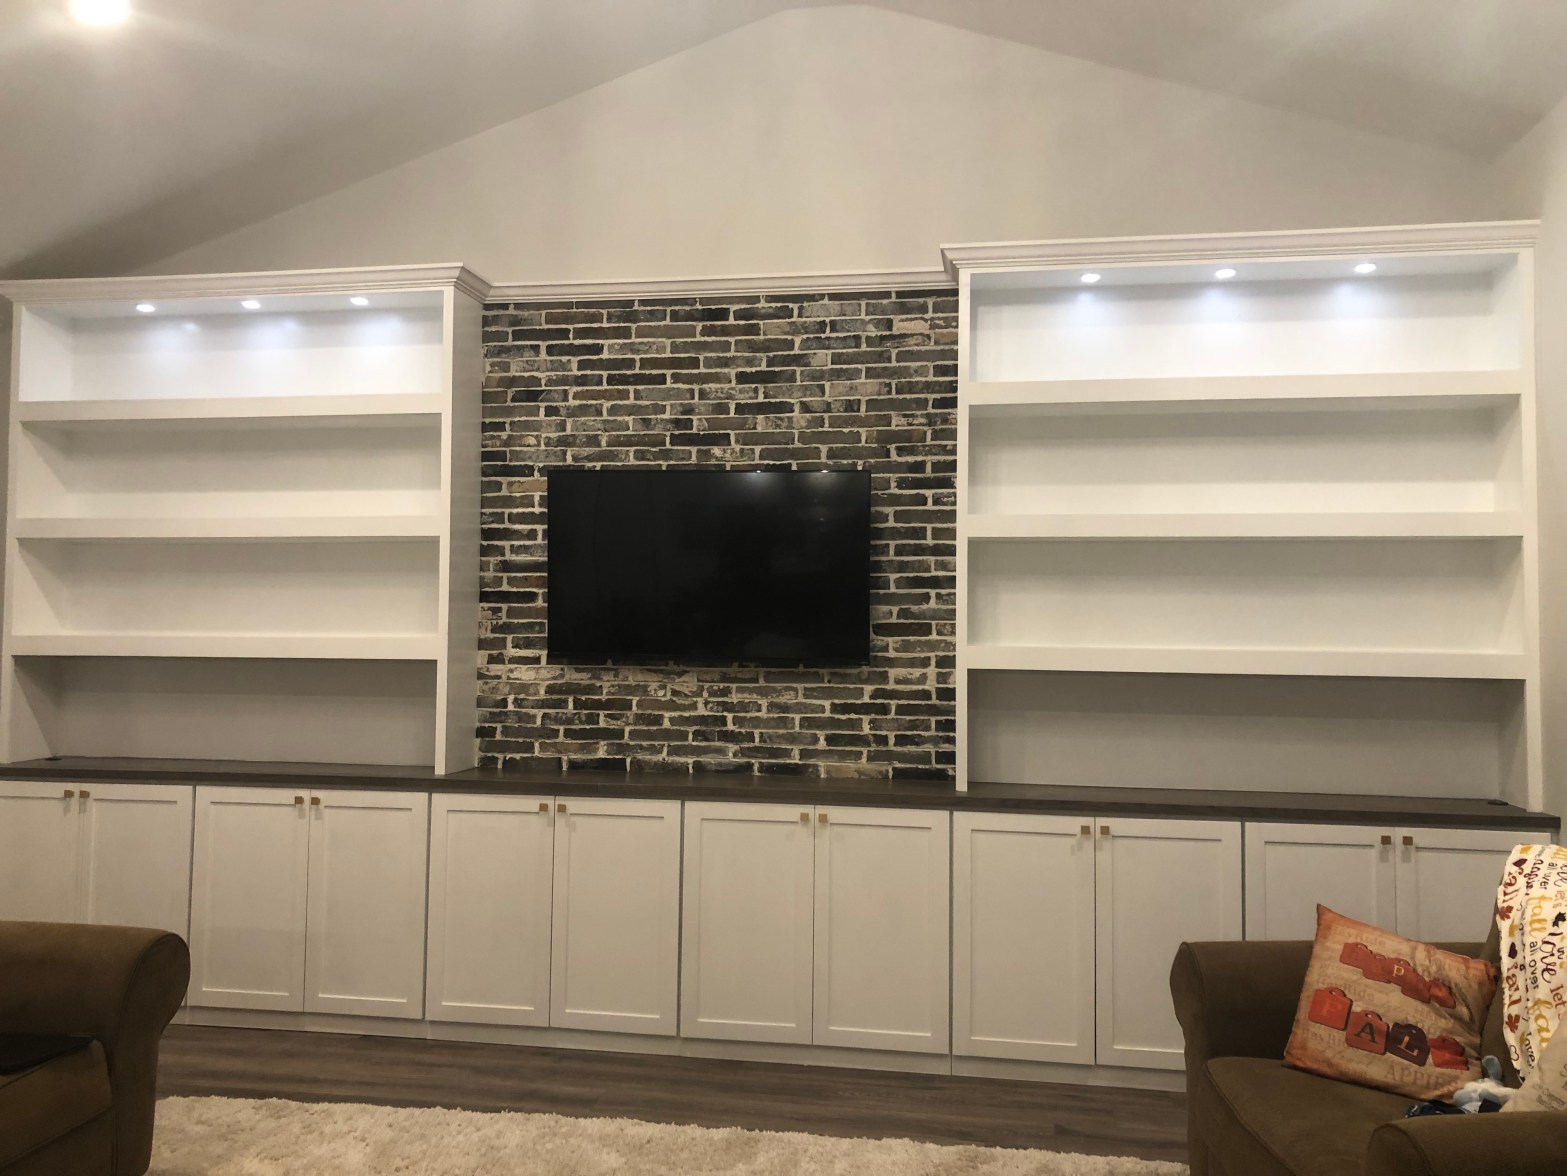
Cabinets are the base of many of the projects that I do, and because I customize each project for the client and their space I custom make all of the cabinets for my projects. Custom cabinets are a great way to maximize the space you have and the storage you’ll get. Cabinets when you break it down are really just a box, so in this post I will explain the process for making that box.

The Process
Making custom cabinets begins with plywood. I highly recommend using plywood and not particle board or mdf, the latter are just not as durable. If you’re going to go to the trouble of making cabinets why not use a quality, durable material. When making cabinets that will be painted on the outside, I prefer to get plywood that is prefinished on 1 side. You likely won’t find this in your typical big box store, but if you go to a cabinet supplier or wood supplier you’ll be able to get prefinished plywood. This will also make dealing with the inside of the cabinet much easier as you don’t have to worry about painting or finishing the inside.
The other thing to consider when getting your material is the size, I prefer and highly recommend using ¾” plywood for your carcass. You’ll need some ¼” plywood as well for the back part of the cabinet, but make sure the main portion of your cabinet is ¾” plywood so it will hold up over time. You’ll also need some lumber for your face frame, this is where your budget can determine the species. A few things to consider as well is the use of this cabinet, is it going to by used all the time and have things in it that can bump and scratch the face frame? Is it more of a long term storage that will only be opened a few times a year? You can get away with a softer cheaper wood like pine if you’re not going to be using it alot, but if it is going to be a high traffic piece, I would go with a harder material like maple, and poplar is a good middle ground. Poplar is still a softer wood, but is a step up from pine and it paints well. Of course if you’re staining the cabinet opposed to painting you’ll want a more stain compatible wood like white oak.
Now that we’ve made a decision on our materials it’s time to start breaking down our materials. First take your plywood and you will rip it to the final depth minus the face frame thickness (usually ¾”). You will need 2 pieces on the sides that are the correct depth and height. Then you’ll need a piece for the bottom of the cabinet which will be width minus 1-½”. (You could cut a dado in the side pieces to receive the bottom piece for an extra sturdy cabinet, which would change the size of the bottom piece). Now that we have the main pieces of our carcass we need to cut nailers for the cabinet. Rip down plywood into 3-½” pieces that will be the same width as the bottom piece. The final piece of cutting required for the carcass is to cut a dado in the back of the side pieces. To do this, add a ¼” dado stack on your table saw, take one of your nailers and put it upright between the saw blades and your fence, then lock your fence in place. Now run the finished side facing down through the table saw on 1 side of each side piece.
The next step is to add some pocket holes to your nailers and bottom piece. Both ends of the nailers and both ends of the bottom face of your bottom piece. Assembly should go like this; glue and screw in a nailer to the top front of a side piece, top back (but still in front of your dado), back side behind the dado near the top, and back side behind the dado near the bottom. (see video for more details) Once you’ve completed that on 1 side add some glue to the other ends of the nailer and clamp the other side in place so you can screw in the 2nd side piece. Now you’ve got a rough cabinet, cut some spacer blocks to 2-¾” so put under the bottom of the bottom piece and clamp it all in place so that you can add glue and put the bottom in place. Some good clamps will keep the piece from moving around while you add the pocket hole screws from the bottom side. Lastly, cut the back panel out of your ¼” plywood and slide it into place. You can add a couple of nails or staples to keep it from sliding around.
Now you’ve got your carcass together we will need to make the face frame. Mill down your lumber to 1-½” for the top and side pieces and 3-½” for the bottom. You want to make the overall width of the face frame about ⅛” wider than the cabinet to ensure you have good coverage. Glue and pocket holes will once again make this easy work, but if you’re into the more advanced method some biscuits, dowels, or dominos could also be used with some glue and clamps. The wood top is fairly simple; select your lumber of choice, plane it down so you have even surfaces, joint the edges so you have straight edges to work with, and finally glue them together. Again any type of alignment mechanism would work here, but if it’s only a joint or two you could get away without it as long as your cognizant of alignment while you’re doing your glue up. I like to add a face piece on the top as well to give it the appearance of a thicker piece of wood. Then just sand, stain, and finish the top. Now you’ve got a cabinet with a wood top custom made for your space. If you’d like to add doors to this cabinet be sure to check out the post I wrote about how to make cabinet doors.
Discover more from CRAFTED IN FLORIDA
Subscribe to get the latest posts sent to your email.

One thought on “How To Make Custom Cabinets”