

Epoxy river tables are a big time trend on the internet in the woodworking world. There are some youtube woodworkers that have made their name doing epoxy tables. I’ve done some work with the epoxy before, but have never taken on the full river table project. That is until now, my brother in law wanted a new coffee table and I pitched the idea to him and my sister. Then when I through in the idea of floating his alma mater’s logo to float in the middle of the table he was sold! The process for building this table was pretty simple, just time consuming.
The process begins with laying out the pieces to get an idea of how it’s going to look. I had some left over walnut from another project so I lined that up with the logo that my brother in law had already. The walnut was live edge with the bark still on. The bark has to come off before you can pour any epoxy. The epoxy would stick to the bark and not the wood causing splitting over time. I used a chisel, wire brush, and a sander to get the wood clean. Once it’s clean I can create the mold.
The mold is what’s going to hold the piece in place while the epoxy cures. Most molds are made from melamine or silicone, but you can use can use mdf or plywood as well it’s just necessary to cover the mdf with tape so that the epoxy doesn’t stick to the mdf. I used packing tape, but anything that seals it will work, just be sure to overlap the tape so there is a complete seal. The side walls need to be removable so use screws and be sure to tape those as well. Once the mold is assembled it’s important to caulk the seams to make sure none of the epoxy leaks out.
Once the mold is sealed completely and the caulk has dried it’s important to add a wax or some kind of mold release to the entire mold. If you skip this step the epoxy will stick to the tape and the removal process will be a pain in the butt. (Ask me how I know). Then with the mold ready that next step is to put the wood in the mold. When you place the wood in the mold you need to make sure it is clamped down, but use some collars to make sure the clamps don’t stick to the epoxy. Then we pour!
Mixing the epoxy is simply following the instructions based on the brand you are using. I used liquid glass, and it was a 2:1 ratio on the mix. The hardener being the smaller portion. Using a clean bucket, I measured and mixed my epoxy, adding color to get the desired color I was going for. Then I was able to pour the first layer of epoxy, it’s a self leveling material so as long as the mold is sitting level it will settle level. Once the epoxy has settled for a minute, I used a torch to pop all of the bubbles on the surface of the epoxy. The bubbles usually are done rising after a few minutes, but be sure to keep an eye on it for several minutes after pouring. You do not want bubbles to cure. (Ask me how I know)
I let the first layer sit overnight and the following morning I added the logo to the center of the piece. The epoxy was still tacky at this point and allowed for the logo to stick perfectly. Then later that day I poured the clear coat on top, this time the bubbles just kept coming for about 35-40 minutes, this is I believe because the logo had some air caught underneath it. Once the bubbles stop coming, we wait. Cure time for this particular project was 48 hours, but if you’re doing an epoxy project be sure to check your product information for your cure time.
Once the piece has been cured, it needs to be flattened, because while it’s a self leveling product, the wood was slightly taller than the final epoxy depth, and the bottom tends to have a thin layer of epoxy that is much easier to be removed with a router on a sled, or in my case I used a cnc. With the piece flat, I can cut this table to its final size. With it cut to size I grab my palm router and add a roundover bit to soften the edges and make it kid friendly. Now this piece is ready for the finishing process. This begins with sanding through the grits; 80,120,220,400,800, and 1000. I added some finish to the wood portion of the table before moving on to the polishing portion of the project. The epoxy gets a polish that will give it that glass like look.
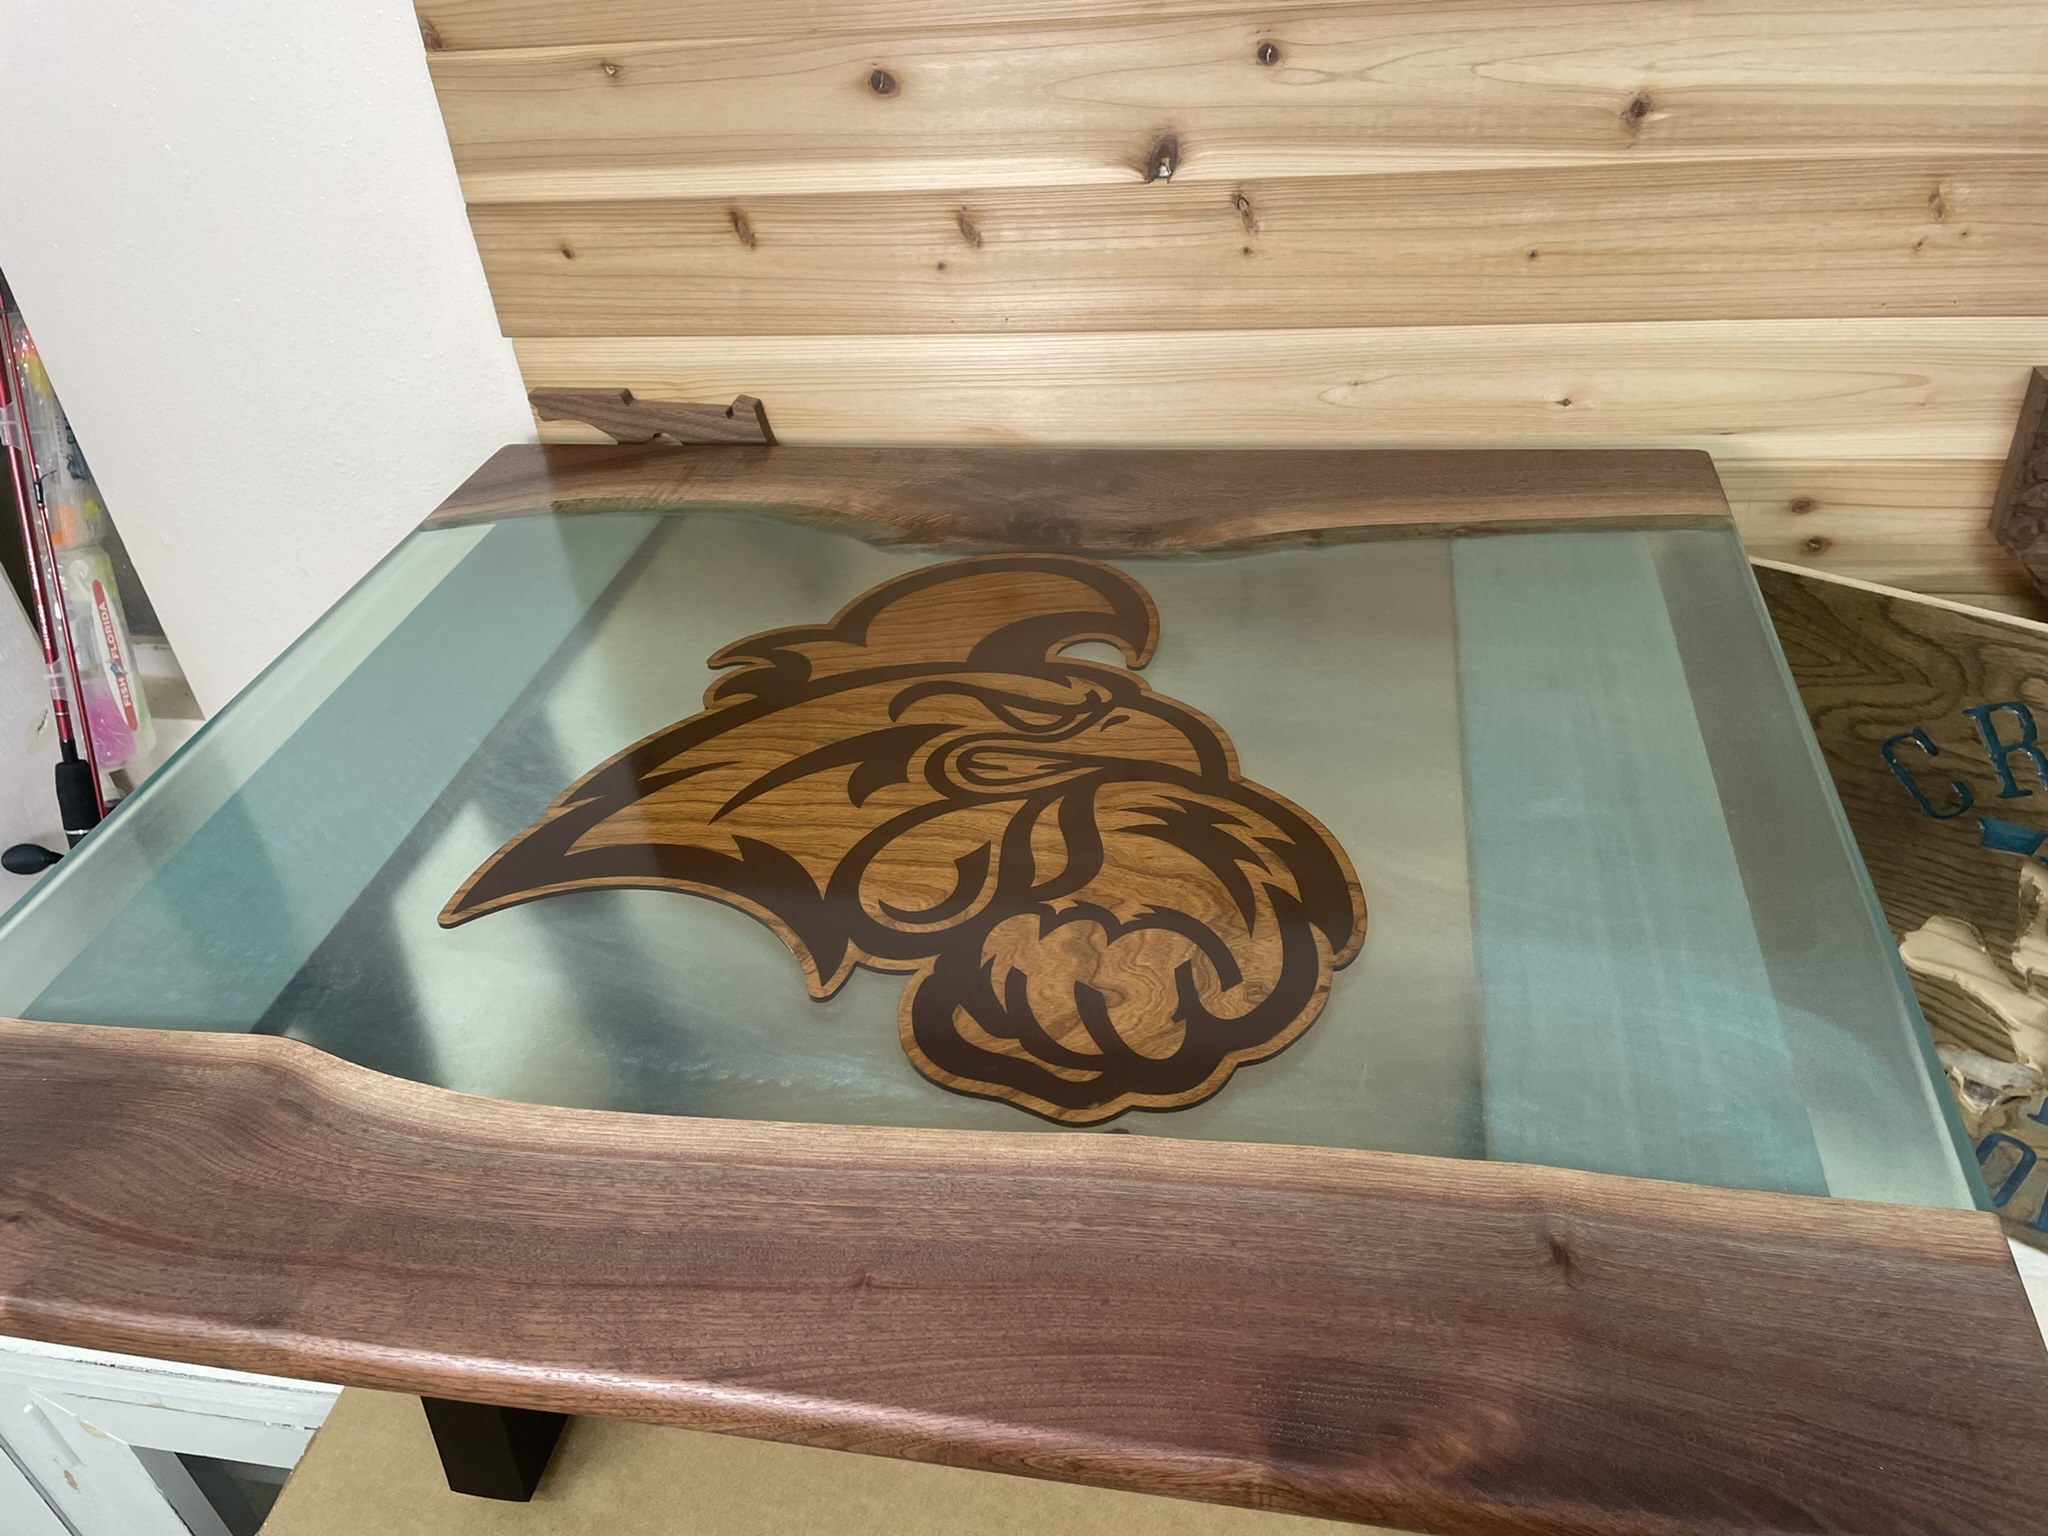
Using a finishing polish I place a few drops on the epoxy and use the buffer to rub it in. I repeated this step 3-4 times just to make sure I got that true glass-like finish. Once the finish was at a point I was happy with, the next step was to wipe the piece clean and add some metal legs. The piece came out great, and I think it’s safe to say the epoxy river table was successful. Thank you for reading this article, watch the video for more visuals and information.
Please like and subscribe so you can stay up to date on the latest from Crafted In Florida. You can also follow us on any of the social media platforms for short and long form clips @Crafted_In_Florida on YouTube, Instagram, Tik Tok, and Crafted In Florida on Facebook.
Discover more from CRAFTED IN FLORIDA
Subscribe to get the latest posts sent to your email.
