

What’s the secret to building a mantle? There are so many fireplace ideas out there and most of that seems straightforward; frame it out, add Shiplap, insert fireplace, and presto fireplace! But you want a mantle, a nice beefy one that looks like it’s from an old barn. Then you go to a dealer who sells those old barn beams and you realize it’ll be way cheaper to make one! So how do you do that?
Making a mantle is actually pretty simple, it can be taken up a notch if you’re inclined to go above and beyond, but it looks great making it with a very simple method. Let’s get into it.
Step 1: select your wood. When you pick the wood you want to use, much of which will depend on your budget, you’re going to need 3 pieces. All need to be long enough that your mantle, preferably the nicest one, has an extra 2’ on top of the width of your mantle.
Step 2: Clean up the boards. This is just straightening both sides, I like to have a final width on the board around 7.25” and the. I run it through the planer to get a fresh face on the board. Once you’ve done this select the piece you think looks the best and label it face. This is going to be the front facing piece of your mantle. You next nicest piece will be labeled top, and then the final is bottom.
Step 3: making cuts. First thing you’ll want to do is take the board labeled face and measure about 9” from one side and mark it. On either side of the mark put an “R”. Next cut with the miter saw straight down that line. Then measure from that cut the final length you want your mantle to be. Make a mark and label either side of that line with an “L”. With the remaining piece of lumber you’re left with measure 9” and make your cut.
Step 4: dry fitting. You now have the face of the mantle pieces, you need to add 45 degree miters on the sides with the letters. Using the bevel on your miter saw tilt is to just a hair over 45 degrees. That little extra will help ensure you get a full 45 degree miter. While dry fitting, take a measurement for the tops and bottoms. Then make those cuts.
Step 5: cut spacers and prepare for glue up. With all the pieces cut out, put your top and bottom on top of each other and measure them up again and set the face board to see how tall the pacers should be. These spacers will help you line up the tops and bottom and will give you help with alignment on the mitered side pieces. Take the long front face of the mantle and glue and nail (with 1-¼” nails or screws) the spacers to the inside of the mantle. Make sure you place them in the middle of the board (from top to bottom). The easiest way to achieve this is to use the top board as a guide, line it up on the top of your face board and then butt the spacers up against it while also lining them up with the inside portion of the miter. By placing the spacer on the end of the miter there is now additional support for the miter and will make lining it up easier.
**You can add biscuits or dowels at this point for alignment, but it is not a necessary step**
Step 6: The glue up. Make sure to have clamps and glue readily accessible. I like to begin by taking the mitered pieces for the face and using some blue tape tape the outside of the pieces together. Make sure you have the grain lined up, you should have the 2 pieces with an “R” on them lined up and the “L” side lined up as well. Place those mitered points together and run 3 pieces of blue tape roughly 12” long across the miter. Then flip the piece over exposing the insides of the miters. Apply glue to those mitered joints and smooth it out, ensuring you have good coverage. Then fold those taped edges over, closing your mitered joints. To speed up the process, if you have a 23 gauge pin nailer, shoot some nails in from the side aiming at the spacer blocks. This will hold the piece in place while the glue dries. Next you can add the top and bottom, one at a time apply glue to the top piece of the mantle along the front facing edge, and the ends. Then slide it into place and apply clamps, making sure that your top piece is flush with the face of the mantle. Repeat with the bottom of the mantle.
Step: 7: Sand and Finish. Once the glue has dried, typically several hours later, but I like to give it overnight, you will pull the clamps off and will begin the sanding process. Start with the lower grits and work your way up to the higher grits. I usually go through 4 grits; 80, 120, 180, 220. After each round, wipe down or blow off the dust. I also like to do a water pop before the final round. By spraying water to the wood you are raising the grain, showing any imperfections, and opening the wood’s pores. Then once the wood has dried, hit it with that last round of high grit sandpaper to smooth it out. When applying finish, ensure you have used a tack cloth and clean the mantle of any dust. Choose a color that you’d like to apply or if you’re keeping the mantle the natural wood color you would skip straight to finish. When applying the finish hand sand between coats with high grit sandpaper, this is where I use 320. Follow your finish’s instructions as far as dry time and when you can recoat the piece. I usually do a minimum of 3 coats.
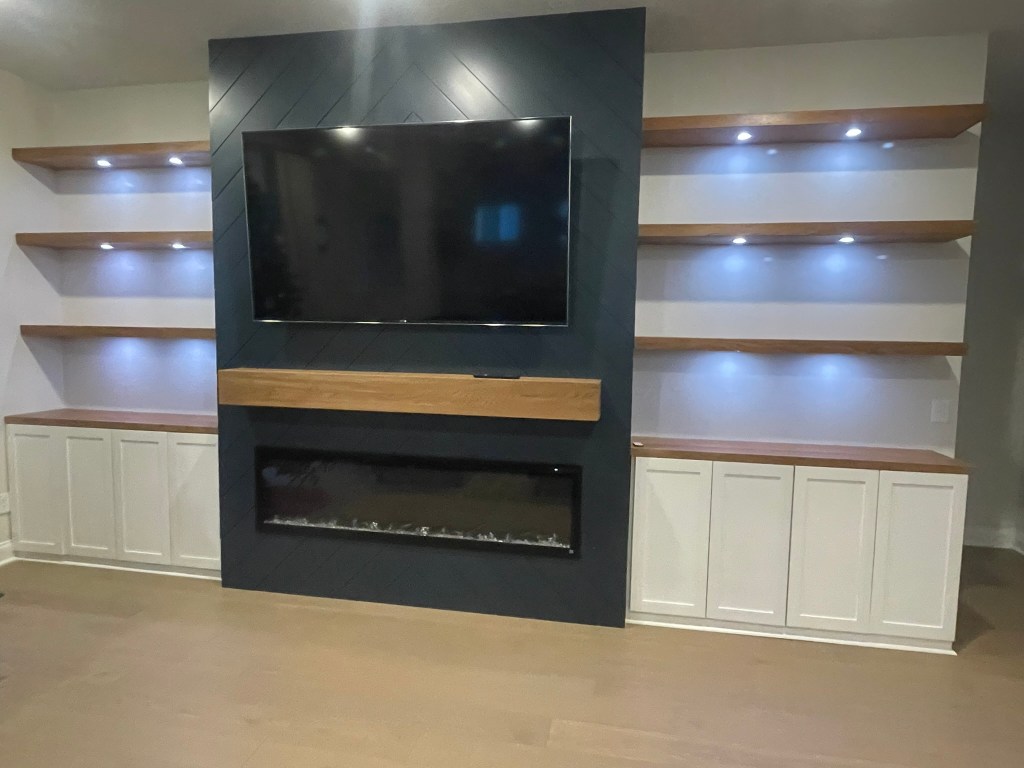
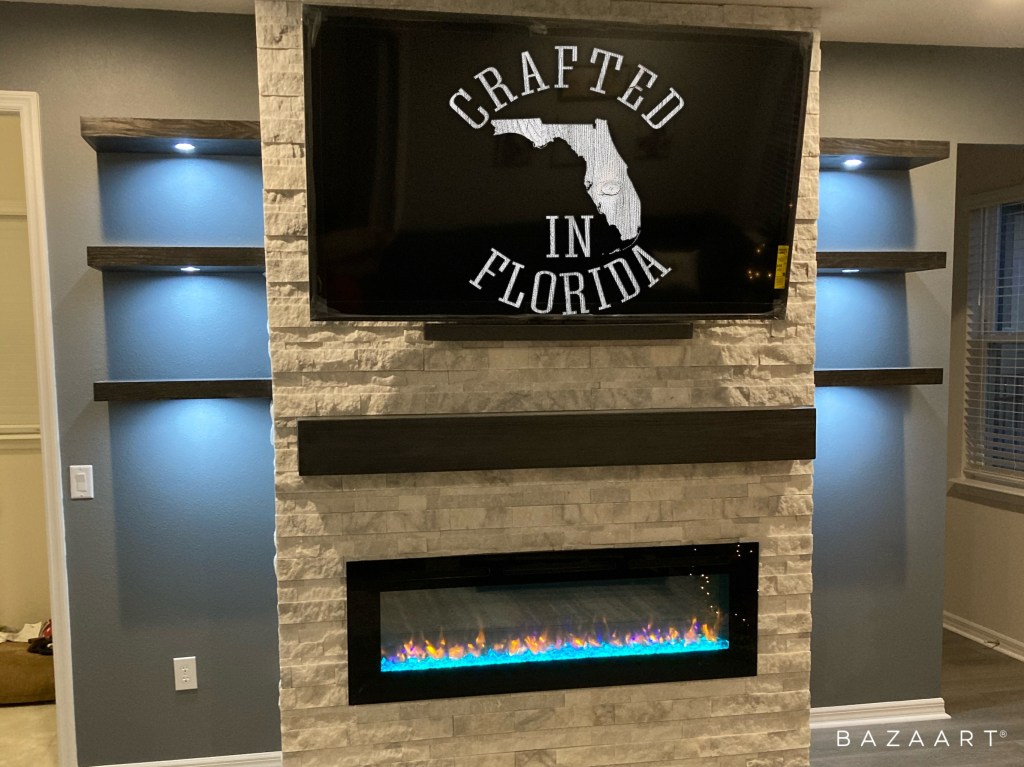
Step 8: Hanging the mantle. I use two different ways to hang the mantle depending on the application. When I’m adding this mantle to a stone fireplace and I know I’m going to add the stone over the mantle I will use 2×4’s to secure to the framing, the framing I will make to hold the mantle will be about 1/16” shy of the width of the top piece. This 2×4 will then have 4-6 pieces secured to it depending on the length of the mantle and will be sticking out to support the mantle. These need to be able to fit inside of the mantle, and don’t forget to take into account the original 2×4 that it will be secured to. Once you’ve leveled that piece and secured it to your wall, pre drill some holes and add trim screws to secure the piece to the 2×4. Then you can add the stone all around it.
The other way to hang the mantle is to use a french cleat. This is simply taking a 1×4, ripping it in half on the table saw at a 45 degree angle, and securing one side to the wall (the side should have the top of the miter on the outside of the piece) and the other side is secured to the underside of the top of the mantle. The piece secured to the mantle should have the outside of the miter facing what will be the wall. Then the piece can just be placed on the hanging piece that is attached to the wall.
I hope you enjoyed this article and learned something about creating your own custom mantle.
Discover more from CRAFTED IN FLORIDA
Subscribe to get the latest posts sent to your email.

One thought on “How to Build a Custom Mantle”