

Remodeling a closet to increase storage capacity.

The Design
As most closets are assembled these days the only thing builders seem to use is the wire rack shelving. I’ve had more requests to rip out wire shelving in closets and pantries then just about any other project, except maybe the built in fireplaces. My son’s closet was another one of these closets; wire shelving, wasted space, and not even a glimpse of appeal. So the plan is to rip the old wire shelving out, add some plywood shelving and split the closet into three spaces, adjustable shelving, hanging bars, and additional storage up top. This will help avoid the piling of games and toys on a single shelf and still leave plenty of space for clothes to hang.
The Process
This project starts with two sheets of plywood. I begin by ripping the plywood down the predetermined depth. One thing you’ll want to consider if you’re building this project is that there needs to be enough space between the top of the built in and the upper walls of the closet. Once I have the pieces cut to size I decided to go ahead and apply the edgebanding to all the front facing end pieces. After applying the edgebanding, I primed and painted the pieces.
Now that the plywood is cut and prepped, I also cut the nailer pieces that will hold the unit to the wall. While the plywood is drying I begin ripping out the old wire shelving. This shelving will simply lift off of the supports, the tedious portion is pulling the nails out of the drywall anchors and patching those holes. Once everything is out of the closet I can cut the baseboards. The best way I’ve found to cut the baseboards is to just put the upright on top of the baseboard and make that mark so I know exactly where to make the cut, then I place nailer between the two uprights and mark both sides of the plywood on the baseboards so I can use my oscillating saw to cut out just that portion of the baseboard.
Once both sides are in I can add the top piece. Attaching the top of the unit I should be careful to make sure it’s plum and level, now if you watch the Youtube video you’ll see that I did not take into account the fact that the pieces on the side were sitting below the carpet and I had not taken that into account. It is an easily fixable mistake and it was made clear when adding the shelving. By loosening the screws that held the unit against the wall, I was able to slide my crow bar under the piece that was sitting low. I placed a level on top of the unit and stepped on the crow bar, lifting the piece until the piece was level. Then I simply drove the screws back in, securing the unit to the wall once more. Now that the entire unit is in, it was time to add the shelves and the hanging bar. I started with the hanging bars, keeping in mind that my son will eventually need enough space for larger clothes, so I allowed for about 40” from one hanging bar to the other, then used a hanger to find the appropriate spacing from the wall so that the clothes will hang correctly.
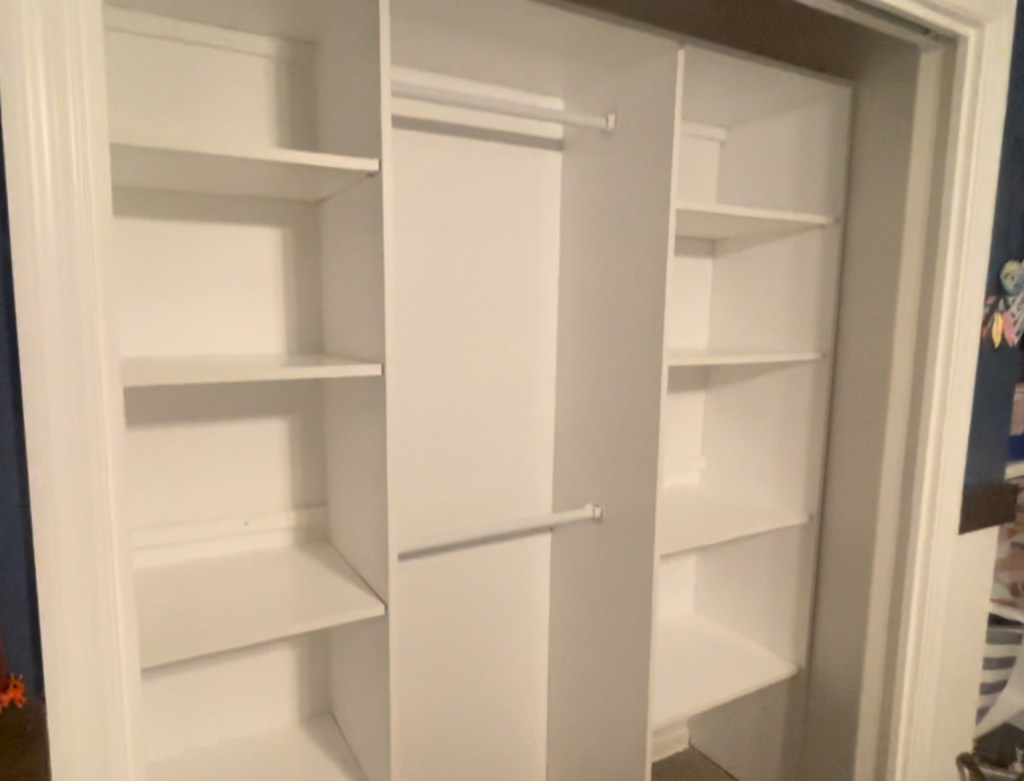
For the shelves I decided that rather than adding shelf pin holes along the entire unit, I had a pretty good idea of where I wanted the shelves to sit so I was going to add the shelf pin holes only in that area. I cut spacers to ensure that all my holes are drilled at level and used a Kreg shelf pin jig to make sure that I didn’t drill through the plywood and that the holes were the correct size. The shelves then just sit on the pins and now we have a brand new closet.
If you enjoyed this or learned something, please like and subscribe here and the YouTube page to stay up to date on all of the Crafted In Florida Build Recaps.
Discover more from CRAFTED IN FLORIDA
Subscribe to get the latest posts sent to your email.
