

Design
The design for the project is clearly all about crown molding. Crown molding is added to the top of the walls up against the ceiling. It is used to add some flare to a room and give it a little something extra. There are several different styles of crown molding and there are many additional trim pieces and configurations that can give the crown a unique look. The style of crown that I used in this project and coinciding YouTube video is basically a cove style crown, or some people have referred to it as craftsman style.
The Process
When installing crown molding I really try to pre paint the pieces prior to install. This is not a necessity, but having two coats on the trim before installing will save a bunch of time later on when it comes to wrapping up. Once the pieces are all painted the first step is to measure out the walls. I like to start on the longest wall, because the first piece I use will not have a mitered cut. While up on the ladder measuring, I bring a small cutoff piece of the crown and will put that piece in the corner. I take that piece and make sure the flat sides on the back of the crown are flush up against the wall and the ceiling. With it pressed against the wall I mark on the wall with a pencil the bottom of the crown, I then repeat this process on the other end of the wall. With those two locations marked I then snap a chalk line connecting those two marks. This will give me an easy way to make sure that I have the crown in the right spot along the entire wall.
Pro tip: if you’re working by yourself like I am, drive a screw or nail in to that initial mark you make and hook your chalk line on that nail.
Now that all the walls are marked I take that measurement from the longest wall and straight cut the crown to size. I then simply place it on that chalk line flush against the wall and the ceiling and use the nail gun to attach it to both the wall and the ceiling.
Pro tip #2: use that same nail/screw to hold the other end of the crown while you nail the other end of the crown.
Now that the first and easiest piece is installed we need to take a measurement for the 2nd piece. The measurement will need to be from wall to wall. Now that we have our measurements we need to make sure we cut our miter correctly.
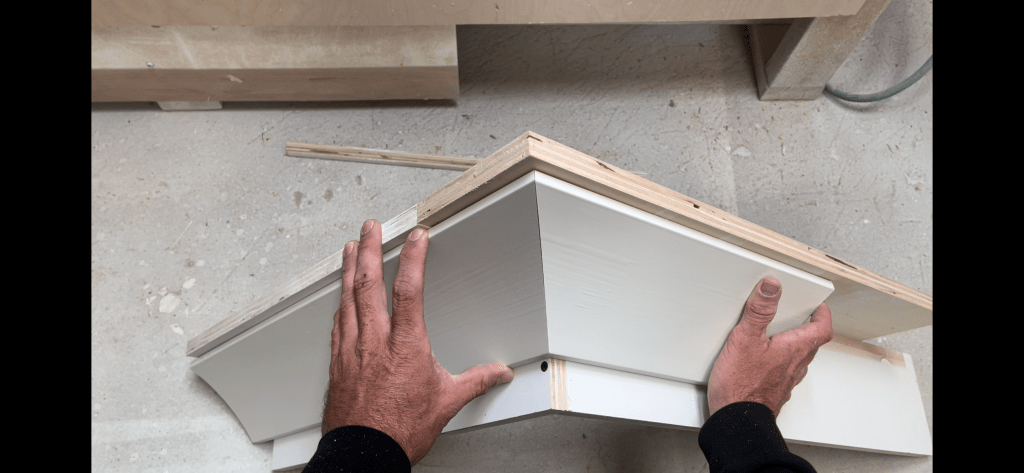
Cutting miters on crown requires a specific technique. Take that initial scrap piece you used before and bring it to the miter saw. With the bottom of the crown up against the fence of the saw and the top of the crown on the table of the saw make sure that both of the back sides are flush against the fence and the table. Mark both of those positions on the saw, the fence and the table. Now that those marks are on the saw we can then make our miter cuts without having to fool around with the crown, we can just make sure we are on the lines before making our cuts.
The 2nd piece will receive an inside 45 degree miter on the side that will be intersecting with the first piece. Then that inside angle will get cut back to use our coping technique on the crown. We’ll take a coping saw or a jig saw and cut at an angle all of the excess wood from the crown. Most people will be using primed crown molding and this will make finding the correct line easier, as you basically need to cut off any exposed wood/mdf and get right up to the primed portion of the crown molding. Once this is complete you will install this piece with the coped edge fitting up against the piece that you have already installed on the wall.
You will repeat this process for the 3rd piece and then the 4th piece will have two coped sides. When all four pieces have been installed the next step is to fill the nail holes and caulk the top and bottom of the crown molding. Once everything is caulked and filled a final touch up coat of paint needs to be applied. Then boom we’ve installed crown molding in a simple 4 wall room!
There are of course many rooms that are not simple 4 wall square/rectangle rooms. When working with different spaces, we can of course use our coping technique for any inside corner. For outside corners we will need to miter both sides and really focus on where the pieces are on the miter saw when making the cuts. You will inevitably cut an outside miter one time where is seems like one piece is just longer than the other. What has happened is your piece was not firmly against the fence and table of the saw on your lines when the cut was made. This causes that miter to be at a different angle when cutting and creates a longer or shorter miter that will not match up to the other side of the 90.
You may also run into issues with the ceiling not being flat and causing the miter to not line up properly.
Discover more from CRAFTED IN FLORIDA
Subscribe to get the latest posts sent to your email.
