
Build Recap

The Process
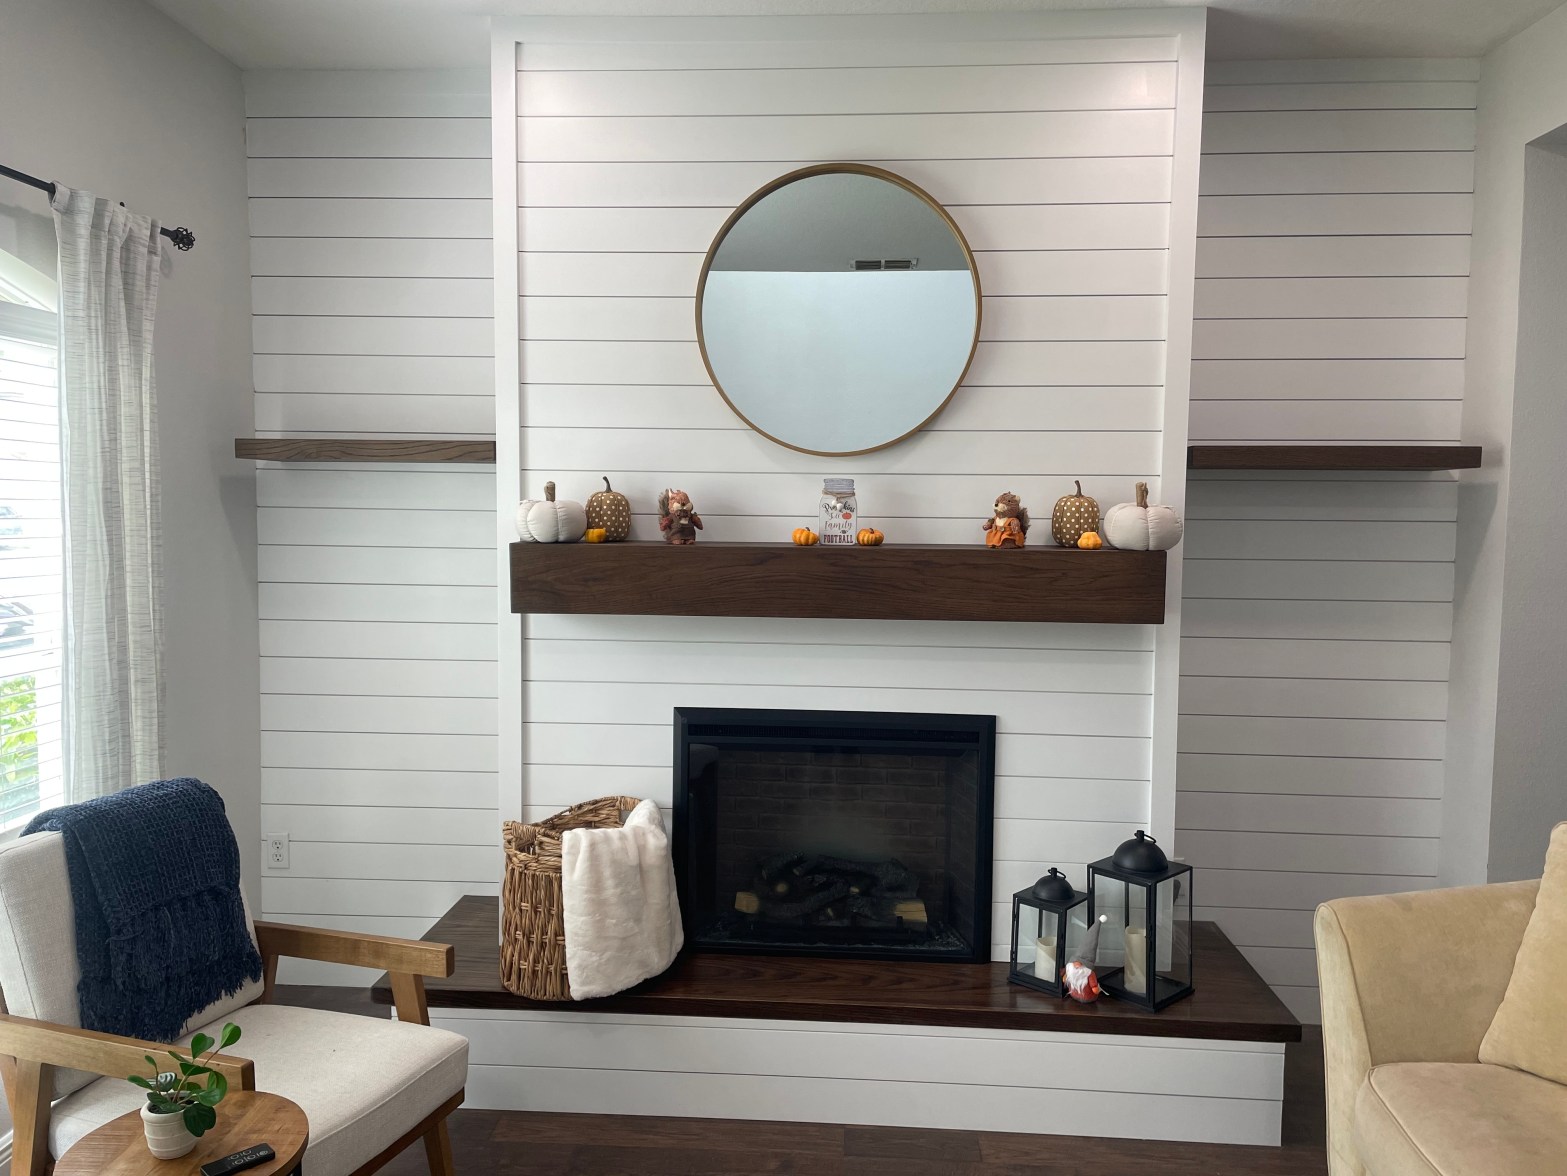
The Design
The design for this project was inspired by some pictures from my website of previous projects. The client wanted to the hearth as they envision it not only as an extra place to sit, but the idea of decorating it especially around Christmas time. We discussed that plan for the stain to be similar to the floor, and that color would be used on all the wood stained pieces; hearth, mantle, and floating shelves. The client also liked the shiplap looking continuous from one end to the other, but liked the framed out look of the trim on the sides of the fireplace versus the mitered edge. The overall piece turned out exactly how the client envisioned it and was very happy with the project.

The Build
This build began in the shop with the construction of the mantle, hearth, and floating shelves. All of these pieces where made from white oak, which I purchase pre-milled in S3S form. Since I’m starting with 3 smooth faces, I start by ripping the white oak boards to width on the table saw, then run them through the planer to just get a fresh face on all sides. The mantle requires miters on the front facing piece of the mantle, then are glued together with clamps and some blocks that help the piece hold it’s shape until the glue can dry. While the mantle was drying I began work on the floating shelves. These shelves are 2-½” tall and also have mitered edges, the additional step I take with the shelves versus the mantle is to add a dado on the top and bottom of the front face to accept the white oak plywood boards. These boards are cut to size and glued in place, also using blocks to help hold their shape.
Finally I put together the hearth, this piece I took a nice wide board and used that as the main portion of my hearth. I used the extra pieces that I had cut off to extend the hearth for the wrap around portion. This helps with the grain continuity, I then add a white oak trim piece around the front facing edge. That trim piece gets an ⅛” roundover and then it’s time to sand all of these pieces. Once sanded the pieces get wiped down before receiving stain and finish.
Now that all of the stained pieces are complete I head to the client’s house to begin framing of the fireplace. The framing is basic 2×4 construction being sure to secure it firmly to the wall and add appropriate spacing between the studs. Once the framing is complete the shiplap can start to be applied. I begin with the bottom making sure to keep everything level so that the joints all line up correctly. The bottom of the hearth was mitered on the outside corners, but above the hearth we added trim along the sides. All of the shiplap was added an painted before installing the mantle and shelves. The mantle was installed using a French cleat, while the floating shelves had a wood frame and metal “L” brackets used to secure it to the wall. With all the wood pieces installed I hung the clients mirror and it was time for finished photos.
Discover more from CRAFTED IN FLORIDA
Subscribe to get the latest posts sent to your email.
