
Build Recap


The Process
The Design
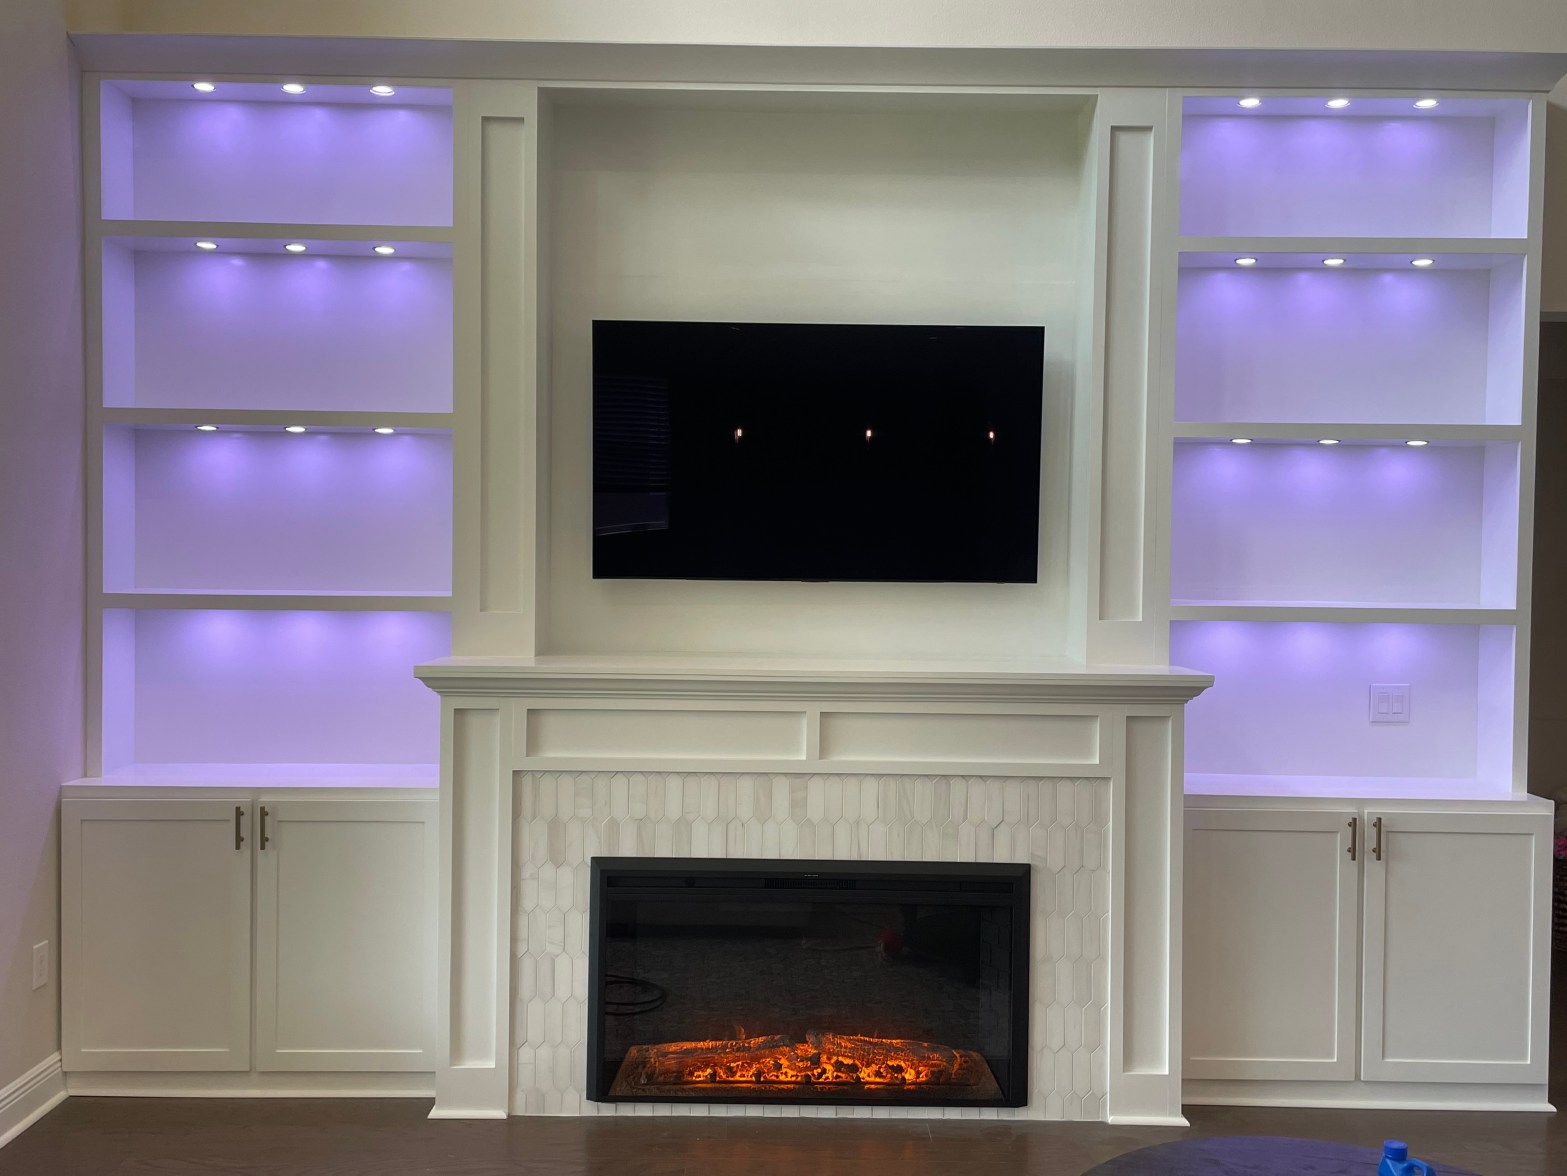
The design process on this build was quite quick. This customer had hired me previously to build this project, then when they moved to a new home in the area they called me to build it again. There were a few small differences that we had to take into account. The main thing was in this new house has a 20’ ceiling so we raised the piece up to 10’ to help take up more space on the wall. Other than that we basically kept it the same minus adjusting a few measurements to make it fit in the new space. The marble elongated hexagons are a great touch for the fireplace surround.

The Build
The build began with some custom cabinets, which began with breaking down some one side prefinished plywood. I ripped the boards to width and then made the cross cuts for the sides, top, and bottom of the cabinets. For the cabinet on the right I knew that the right side would be visible so I set up my track saw and turned the saw to 45 degrees and made a miter cut on the upright and the top piece of the cabinet for them to fit together nicely without showing any end grain. I had nailers cut, so I added pocket holes in order to be able to tie the pieces together. I also added a dado to the sides and top pieces that will accept the back panels. Now that all the pieces are cut I began assembly. I start by running screws through the pocket holes to tie the top to the sides, the nailers are added behind the dado to the back on the top and bottom, and also in the bottom front. For the most part the size of the nailer isn’t terribly important except in the front. It needs to be the size of your base of the face frame minus ¾” for the bottom piece of the cabinet. In my case I like to have a 3-½” piece on the bottom, so minus ¾” I cut the front bottom nailer to 2-¾”. I add the shelves with pocket holes as well with a piece to support the middle since these cabinets stretch almost 4 feet.
For the face frames I rip down some poplar to size and pocket hole and glue them together. I then glued and nailed the face frames to the cabinet carcasses. Now that I have the cabinets prepared I moved on to the uppers. The uppers were constructed similar with the nailers and dado that accepted the back panel. The difference being how I put together the shelves. The shelves were two inches thick featuring a frame of one inch thick scrap hardwood, and a top and bottom of ½” plywood. On the bottom shelves I also cut the holes for the lights before installing them. I batch cut these holes which made it easy and insured that I cut them all in the same location on each shelf.
Once everything was cut I just had to make the doors for the base cabinets. For details on how I made the cabinet doors it’s much easier to show you the details. Check out my YouTube video on how to make shaker style cabinet doors. The basics of it are that I start with some maple stock, I plane it down to a true ¾”, joint one side, rip to 5-½” wide. Then I set up my router table with my cabinet door bits, that create mortis and tendons. I then cut the pieces to size, keeping in mind that the rails (the piece that sits horizontally) will need to be long enough for the tendons on each side to fit in the mortises. I purposefully cut my doors to be about ½” longer and wider than final size, because after glue up I will trim all 4 sides down a ¼” to get them to size. I run my 5-½” pieces through the router with the mortising bit set to the middle of the stock, all pieces will get this on both sides, making sure there is no tear out. If I get any tear out on the mortising bit, I run the piece through the jointer to eliminate that and then run it back through the router. Once all of the pieces have been through with the mortising bit, I change bits to the tendon bit and run the rails through being sure to have a scrap piece behind the rail to avoid tear out. Once all of that is complete I move to the table saw, I set the fence to 2-½” and rip all pieces down. Now that the rails and stiles are ready it’s time to cut the floating panels. I like to assemble the rails and stiles empty, then measure the opening and then add ⅞” to the measurement to account for the mortise. Then it’s time to just glue them all together. It’s important to not glue the panel in, just let it float.
The next thing on the agenda is to build the fireplace surround. I took measurement I knew would be between the cabinets and subtracted the width of the fireplace, and 8” wide for each side of the fireplace that would be tile. With the measurements set, I cut the pieces for the surround, pocket hole and screwed them together. Then I cut some mdf panels to fit behind them and glued and stapled them in as well. I did the same for the two columns that went on the mantle. The mantle was simply a piece of plywood cut to fit the space and stick out far enough past the surround to allow for crown molding to go around the fireplace. The last piece to cut was the piece that was going to connect the two shelving units.
Now that all the cutting is complete the next step was to spend several hours sanding everything, sanding, sanding, and more sanding. Once that was finally finished, I used some compressed air and a cloth to clean off all of the surfaces and prep for painting. I sprayed primer on everything, sanded again, then sprayed two coats of Sherwin Williams Emerald urethane.
The next thing to do was install. I installed all of the cabinetry, framed out the fireplace and installed the surround and the mantle. I added cement board to the fireplace area where the tile would go and then it was time for tile. Using a wet saw I cut the tile to fit the area and made the fireplace fit nice and snug. The tile used was marble so I sealed the tile before applying the grout. Once everything was cleaned up this piece was ready to call done. We hung the TV, turned on the lights and the fireplace and enjoyed the brand new built in.

Discover more from CRAFTED IN FLORIDA
Subscribe to get the latest posts sent to your email.
