
Crafted In Florida
Build Recap


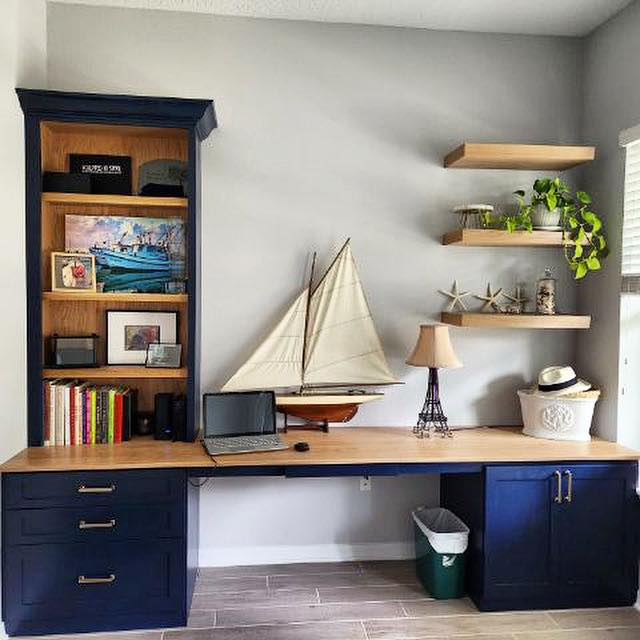
The Design
The office build was a fantastic build. The customer had been using a table as a desk space, but wanted something more functional and something that would bring some character to the space. They also needed something that would provide a space to hide the printer and to hold a bunch of files. Knowing what they were looking for and having put together a rough sketch we put together a plan and began the process.
The Build
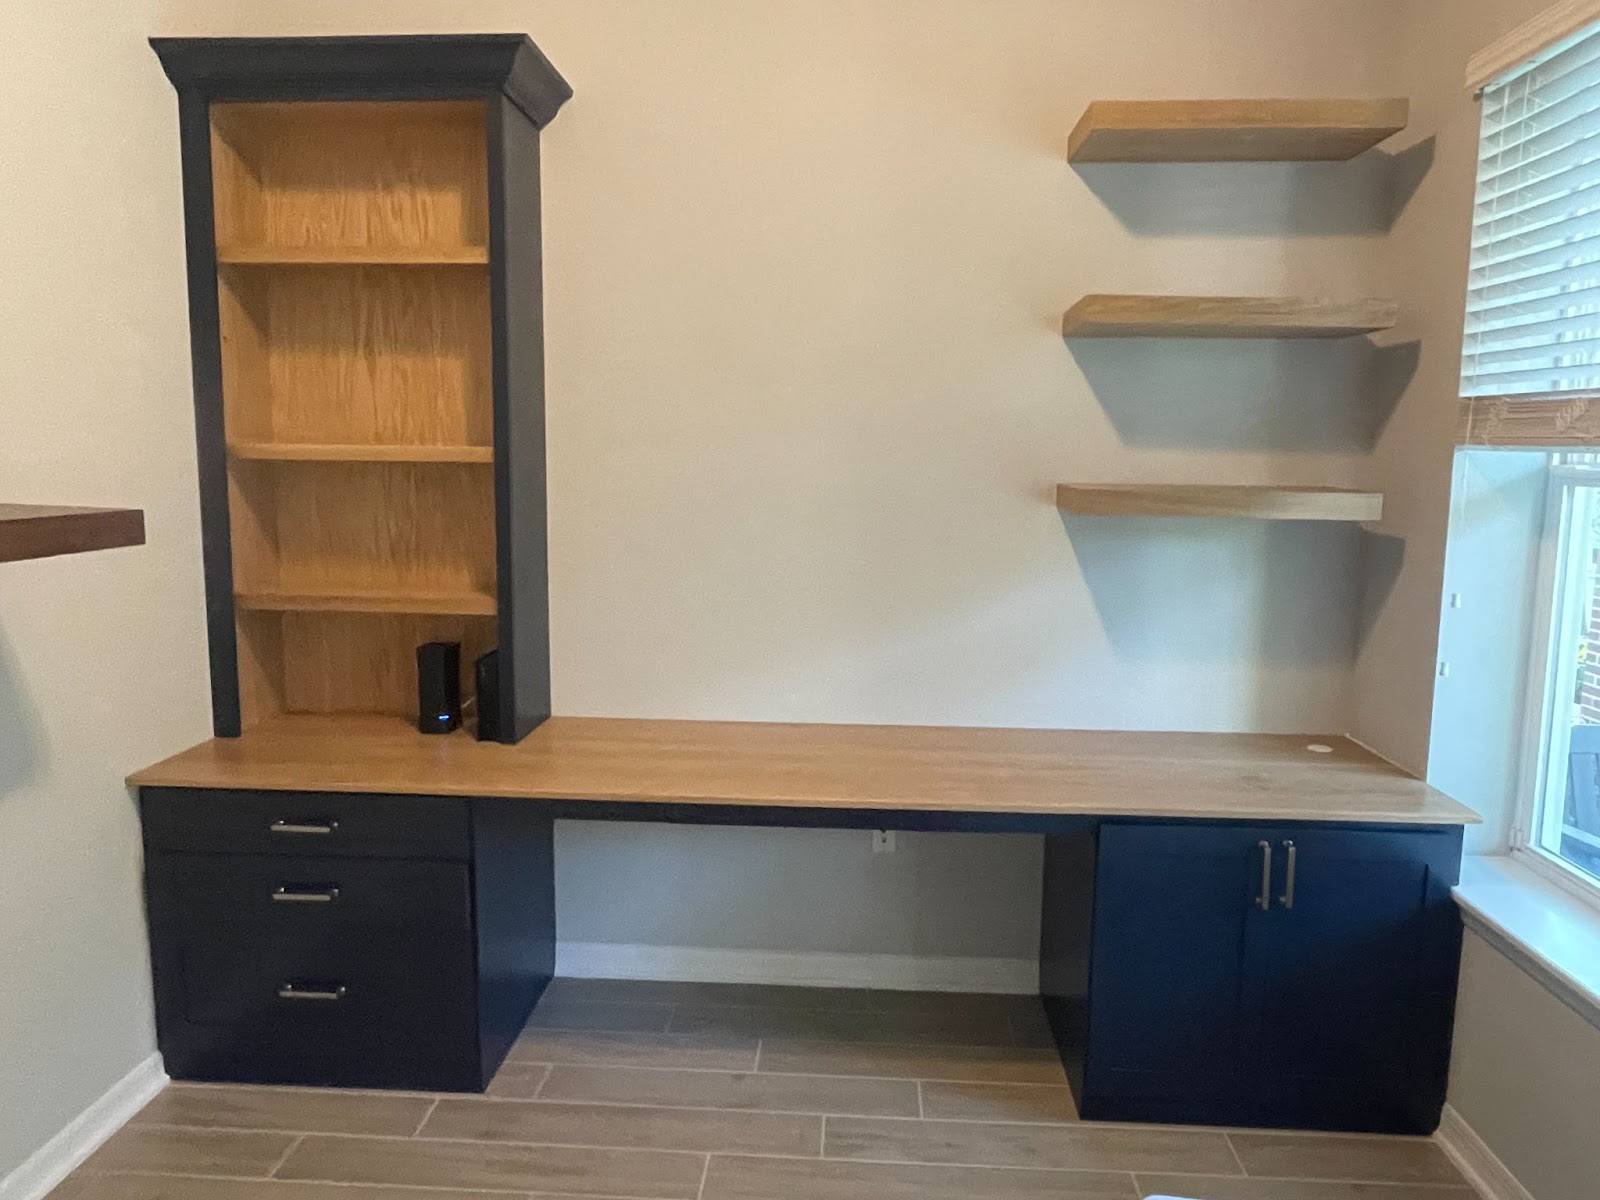
The process begins with building the cabinets for either side of the desk space. I began with breaking down the plywood cutting 2 side walls and a floor for each cabinet. In the 2 side pieces I run a ⅜” dado on the interior side of the plywood starting ¾” from the back. I also add support pieces to the back and top portion of the cabinet to finish the box. I also added supports underneath the base of the cabinets to also give us something to nail the face frame to on the bottom. Once we have our boxes, we move on to the open shelving on the left side of the build. The customer wanted the inside to match the countertop, so we got white oak plywood to give us a matching interior. The width of the open shelving matched the width of the base cabinet that will be underneath it. We also set it up so that we could do adjustable shelves in the open shelving area.
After we’ve put together all of our boxes we needed to build our cabinets, now it’s time to build the drawers that are going inside of those boxes. While we will have traditional drawers on the left side, the right side will have cabinet doors, but have 2 roll out drawers for the printer and its accessories. We first begin breaking down ½” prefinished on 2 sides, plywood. Once we’ve cut them down to the depth of our drawer plus 1” we’ll cut all four sides to length. Then once again we’ll put on our dado stack to cut a dado in the sides of the drawers to accept our bottom piece. Because we’re using undermount slides, I cut the dado ½” from the bottom so that the slides would work properly underneath. Some glue and nails will keep the drawer together and then I just followed the instructions on the slides as far as cutting the back out and drilling the appropriate holes. From there I moved on to the drawer faces and doors. I like to use a hard maple for these as it’s more durable and will hold its shape better. I trim the piece down to 5-½”, plane it, cut to size for my rails and stiles, and then set up my router to cut the mortise and tenon. Last part of the doors and faces is to cut the floating panel out of mdf and sand it before gluing all the pieces together.
With the cabinets prepped and ready for paint, I began working on the countertop and floating shelves. I made these both out of white oak. The countertop was fortunately not too long that I was able to use single pieces lengthwise at just over 10 feet. After milling down to S4S I added some biscuits for alignment and glued up the countertop. While that was in clamps I began working on the floating shelves. For these I used ½” white oak plywood and then white oak lumber for the faces of the shelves. I took the lumber and trimmed it to size, planed and cut the pieces for the shelves. I added miters to the faces to give us a nice look where the grain is consistent. Then before gluing the face together I cut a rabbit in the top and bottom to accept the plywood. With the plywood cut to size and the rabbits cut and ready to accept it I cut a few spaces to ensure that there is no sag in the middle and it makes the glue up easier.
Now that I have all the wood glued up, it’s time to start sanding. Working from 60 grit up to 120, 180, 220, and finally 320. Now with a smooth surface it was time for finish, using the General Finishes clear semi-gloss I added 3 coats to all of the wood finish surfaces, sanding between coats. For the cabinets and cabinet doors I used Sherwin Williams urethane based paint tinted to the customer’s request of Naval blue, after priming and sanding I applied 2 topcoats to all the cabinet pieces as well. From there it was a quick install and the customer added their finishing touches.
Discover more from CRAFTED IN FLORIDA
Subscribe to get the latest posts sent to your email.
