
Crafted In Florida
Build Recap

The Process
The Design
This project started with a recommendation from a previous client, that client had me redesign their boring pantry into a place to display the whiskey collection they have. Their friend, the current client, wanted to display his whiskey collection as well, but his space was different. Rather than converting a builder’s grade pantry he decided to transform his bonus room. Before I arrived he had painted the space completely black, including the ceiling, then sent me a photo of the look he was interested in. The photo was a honeycomb style shelving that would hold 2-3 bottles per shelf. After a few email exchanges we agreed upon a meeting time and that I would bring a few different size samples in order to see what would fit best. After pulling a few of the bottles out we decided on 2 different sizes one for the tall bottles and another for the smaller bottles. We also agreed on the white oak with just a clear finish to really let that natural wood pop off of that black wall.

The Build
The build was full of repeat cuts, 20 small hexagons and 11 large hexagons times 6 pieces per hexagon is 186 pieces. The process starts with picking up some quality S3S 4/4 white oak, and starting the milling process. I began with taking the milled side and putting it up against the table saw fence, I set the fence about an 1/8th of an inch more than the final depth and ripped all of the boards down. Then I took those boards and flipped them around and took off the extra 1/8th of an inch. Once the boards ripped to size, I took them and ran them through the planer. The planer takes off a thin layer on both sides of the boards to give us a fresh face to work off.
Once the boards have been ripped to size, it’s time to head to the miter saw and set up the stop block. For the smaller hexagons I set the stop block at 8” and for the larger ones I set it to 11”. Some people may go ahead and set their angle on the miter saw at this point, but I like to keep it at 0 degrees and just cut it to size. Once the 186 pieces have been cut to size, it’s time to head over to the table saw. I set the blade to 30 degrees and began running those pieces through. Both sides of each piece will get the angled cut. The next step in the process is to get the biscuit jointer out and set up another jig. In this case I needed a block on the side, the back and an additional one that the actual biscuit jointer would run into. The key here is to make sure that the center of the biscuit jointer is about a ¼” left of center on your board. What I like to do is push the jointer in and then slide it to about ¼” to the right of center or about ½” in total movement. This will give you a little play in the exact location of the biscuit so that during assembly you can move things into proper location better.
Our next step is to get the sander out and sand the inside parts of the hexagon. This is much easier to do prior to assembly, I sanded up to 180 grit at this point. Once I had all the pieces prepped it was time for some glue ups. I used “Titebond Thick and Quick” so that I could get through all of these pieces in a decent amount of time. I would take 6 pieces at a time and add biscuits to each joint and one joint at a time would apply a generous amount of glue to both sides, and work the pieces together. Once the entire hexagon was assembled I put a ratchet clamp around the entire piece and tightened it up. Before putting it off to the side to dry I check for square by measuring the cross joints to ensure all the distances were equal. If necessary I would give it a little tap with the hammer, just to get the piece where it needed to be. The benefits of the thick and quick glue is that it sets up quickly and it dries clear. This allowed me to assemble 4 at a time and by the time I finish putting together the 4th one, the 1st one had dried enough to have the clamps taken off and added to the next one.
After I had all the hexagons out of the clamps I pick 5-6 of each size and cut a rabbit in the back for them to be able to accept a white oak panel. I did this by setting a router to the same height as the thickness of the panel. With the panels glued up I began the sanding process, starting at 80 grit and working up to 320 grit. I then wiped the pieces down, hit them with some compressed air and prepped for finish. I use a Fuji Semi Pro sprayer with the cup gun, and I like General Finishes Semi-Gloss. I hit all the hexagons with this, then sanded with 320 between coats. After 3 coats of finishes these pieces were ready for delivery.

The Install
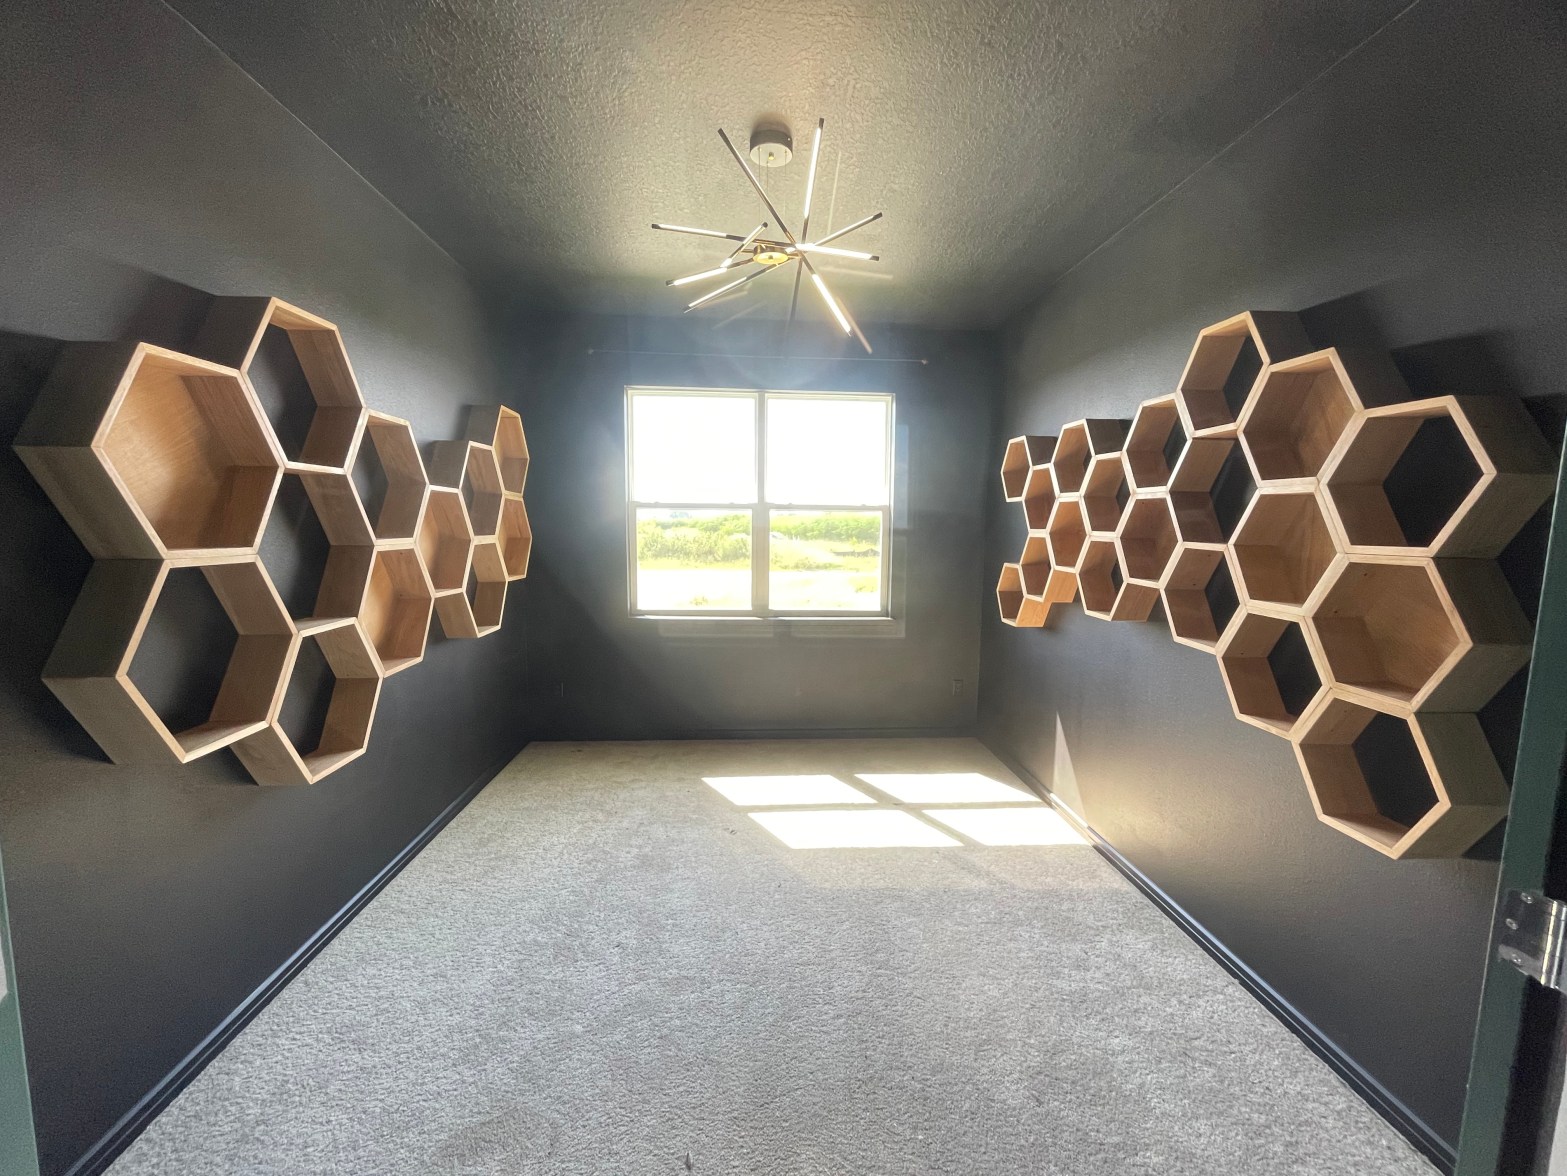
At the customer’s house I put together a layout of each size and had the customer confirm that they like it. I then found the studs and made sure the pieces with the back panels lined up with the studs and began installing with the hexagon on the stud. From there it was a matter of just adding one at a time holding it in place with clamps, checking for level and adding a few discrete screws to secure the connection. After install we added a few whiskey bottles to the piece to see how it all looked and the customer was very happy with it. The honeycomb whiskey bar was complete.

Discover more from CRAFTED IN FLORIDA
Subscribe to get the latest posts sent to your email.
